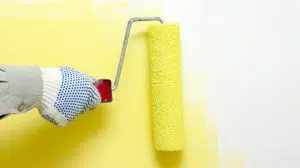
Winter Painting

Winter Painting

Paint Roller

A fresh lick of paint is a great way to spruce up your home, whether it be the interior or exterior. Not only does it look good, it is also an essential element of preserving the integrity of your home. Often summer is a busy time for holidays, travel, weddings and Christmas and it has come and gone before you have even thought about painting the house. Painting in the winter months is therefore a great option and even though not the most obvious choice, with the right products and a skilled painter, there is no reason why winter painting can’t be a success.

ecopainter site, the best construction services in New Zealand

However, get it wrong and you can run into numerous problems:

  • Poor colour uniformity
  • Film Cracking
  • Inadequate stain resistance
  • Slow drying time
  • Water spotting
  • A touch up coat may look lighter in colour than the base coat

Things to consider when winter painting

ecopainter site, the best construction services in New Zealand

  1. Weather: Northland is renowned for being the “winterless north” and temperatures range from a low of 7°C to a high of 20°C in the winter months. On a rain-free day these are very acceptable temperatures for painting. Plan ahead, watch the forecast and remember that paint continues to try long after you finish painting. You will need 2-3 rain-free days after you finish painting.
  2. Daylight Hours:  Winter days can often be clear and sunny, but do remember that the days and hours of daylight are much shorter than the summer months. Get started earlier on in the day, but not too early that the dew is still present. Stop painting early afternoon to allow the paint to having maximum drying time before the temperature drops.
  3. Plan ahead: In anticipation for a fine day, have all the preparation work done in advance. Purchase your paint, brushes, rollers, ladders etc. This way when the weather allows, you can get straight to work.
  4. Winter Paint:  Low temperatures can cause havoc on paintwork, causing it to crack or dry into a powder. By purchasing paints that perform in low temperatures you can overcome these challenges, so be sure to read to manufactures instructions and confirm specific performance temperatures.  Resene Wintergrade products will all dry in temperatures right down to a cool 2°C, ideal for winter painting. Don’t forget to use a primer.
  5. Check the surface temperature:  The air temperature may be above the paint manufactures minimum temperature requirement but the actual wall may not be. Use an infrared thermometer to double check the wall temperature.
  6. Humidity: While not as common in the winter, occasionally this can pose a problem. Humidity is small particles of moisture present in the air, the higher the humidity, the wetter the air. High humidity keeps the paint wet and prevents the paint from properly bonding to the wall.   Deal with any humidity problems before beginning a painting project.
  7. Heating: For internal painting, turn on the heater and get the space warm. For external painting, set up scaffolding, wrap and then heat area if possible. Keep the heaters running for a few hours after painting. These preparations will help the paint dry faster, just don’t turn the heat up too high – you don’t want to suffocate the painters!

If you consider all these things, then winter painting is definitely worth a shot, just remember to follow the paint manufacturer’s recommendations.  Better yet, get a professional in to get the job done right, first time. Northland Painters have been Northland’s painting specialists since 1992 and can carry out on-site inspections before starting painting projects. Workmanship is of the highest standard and Resene or Dulux products are always used to the manufacturers guidelines.

ecopainter site, the best construction services in New Zealand

Leave a Reply

Your email address will not be published. Required fields are marked *