Expert Tips for Preparing Your Walls for Plastering
Plastering may seem like a straightforward task, but getting those perfectly smooth walls requires careful preparation. Are you renovating an old house or working on a fresh build? The secret to a flawless plaster finish starts with what lies beneath. It’s just like baking — your ingredients might be top-notch, but without the right prep, you’ll end up with a flat cake. Let’s dive into the nitty-gritty of prepping your walls for plastering and set the stage for success.
Understand the Importance of Preparation
Why does wall preparation matter so much? It’s simple — poor preparation equals poor results. Even if you’re well-versed in plastering, it would be challenging to fix a wall riddled with loose paint, grease, or cracks. In such a case, it’s best to call a GIB fixer in Auckland for the best preparation and results. Proper prep ensures:
- A strong bond between the wall and the plaster.
- A smooth, even finish that’s free of lumps and bumps.
- Longevity, reducing the risk of cracks or peeling over time.
Basically, it is the foundation for a professional-looking job. Now, let’s move on to the how-to part.
Start by Inspecting the Surface
Before you grab a trowel or bucket of plaster, take a good, hard look at your wall. Is it clean? Are there cracks, holes, or damp patches? A quick inspection can save you a lot of headaches later. Here’s a checklist to guide you:
- Cracks and Holes: Note any damage that needs filling.
- Loose Paint or Wallpaper: These will need removing.
- Dampness: Signs of moisture could mean underlying issues.
- Unevenness: Large bumps or ridges may require sanding or scraping.
Gather the Right Tools
Having the right tools on hand can make all the difference. Here’s what you’ll need for prepping your walls:
- Scrapers and sandpaper
- A putty knife and filler
- PVA primer and a roller/brush
- Masking tape and drop cloths
Clean the Surface Completely
Your wall is like a canvas. To make it “blank,” you need to remove anything that could interfere with the plaster’s adhesion. Here’s how:
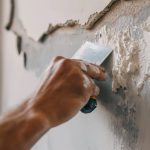
- Peeling Paint or Wallpaper: Use a scraper or steamer to get rid of these. For stubborn spots, try sandpaper.
- Grease and Grime: Clean greasy areas with a mixture of warm water and a mild detergent. A clean rag works wonders.
- Dust: Dust is a silent enemy. A quick wipe with a damp cloth can remove most of it.
Repair Cracks and Holes
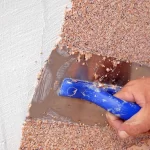
Next up, tackle any imperfections. You can’t plaster over cracks and holes without addressing them first. Use a filler or patching compound to fill gaps, then smooth it over with a putty knife. For larger cracks, consider applying fibreglass mesh tape to reinforce the area before filling it in. Let everything dry completely before moving on.
Prime the Surface
Priming might sound like an optional step, but it’s essential. A primer — or PVA (polyvinyl acetate) solution — helps create a slightly sticky surface, allowing the plaster to grip better. Here’s how to do it:
- Mix PVA with water in a 1:4 ratio.
- Apply it evenly using a brush or roller.
- Wait until the primer is tacky but not fully dry before applying plaster.
Deal With Uneven or Porous Surfaces
Not all walls are created equal. If your wall is particularly rough or porous, consider applying a base coat of bonding plaster before the final coat. This layer will level out uneven areas and provide a more stable surface for the top coat.
Mask Off the Surroundings
Plastering can leave your house messy. You don’t want to spend a huge amount of time cleaning your home post-plaster, right? So, it’s best to mask your surroundings before the plastering begins. Protect areas like skirting boards, windows, and door frames with masking tape and plastic sheeting. It’s a small step, but it can save you hours of cleaning later.
Check for Proper Room Conditions
Temperature and humidity can affect how well your plaster sets. Ideally, you want the room to be dry and at a moderate temperature (around 18-20°). If the area is too cold or damp, use a dehumidifier or heater to create the right environment.
Take Your Time
Prepping your walls isn’t a race. Rushing through the process might seem tempting, but it’ll only lead to mistakes. Discuss with your family or partner about what type of finish would look best. Invest the time upfront, and you’ll be rewarded with a professional finish that lasts.
Final Thoughts
Preparing walls for plastering isn’t the most glamorous part of the job, but it’s the backbone of a beautiful finish. The expert tips shared above will help you create a strong foundation for smooth, durable, and visually stunning plastered walls. No matter if you’re a DIY enthusiast or hiring a professional, never underestimate the power of good prep. After all, a little effort now saves a lot of frustration later. So roll up your sleeves and get your walls plaster-ready.


 Previous Post
 Next Post
